Introduction
Are you experiencing signal problems with your DStv satellite TV service? Don’t worry; we’ve got you covered. This guide will provide practical troubleshooting tips to fix your reception and ensure uninterrupted viewing of your favorite shows and channels.
Why is a strong signal important?
A strong signal is crucial for a seamless viewing experience. It ensures you receive high-quality audio and video signals, minimizing disruptions and pixelation. When the signal strength weakens, you may encounter issues such as freezing or loss of movement.
Who can use this guide?
This guide is designed for DStv users experiencing signal problems and want to troubleshoot and fix the issue themselves. By following the step-by-step instructions, you can identify and resolve common signal problems without needing professional assistance.
Understanding DStv Signal Problems
Causes of DStv Signal Problems
Before diving into troubleshooting, it’s essential to understand the common causes of DStv signal problems. Signal issues can arise due to various factors, including:
- Weather conditions: Heavy rain, storms, or strong winds can disrupt satellite signals.
- Physical obstructions: Trees, buildings, or other objects blocking the line of sight between your satellite dish and the satellite can lead to signal problems.
- Equipment malfunctions: Faulty cables, connectors, or a misaligned satellite dish can result in poor signal reception.
- Decoder issues: Outdated software, incorrect settings, or a malfunctioning decoder can contribute to signal problems.
Effects of DStv Signal Problems
When you experience DStv signal problems, several issues can arise, affecting your viewing experience:
- Poor picture quality: Signal problems can result in pixelation, freezing, or loss of audio and video quality.
- Missing channels: Weak or no signal can lead to missing channels or channels with intermittent reception.
- Signal loss: In severe cases, you may experience a complete signal loss, resulting in a black screen or “no signal” message on your TV.
- Inability to access services: Signal problems can prevent you from accessing interactive services, on-demand content, or other DStv features.
You can now troubleshoot and resolve the issue by understanding the causes and effects of DStv signal problems.
Checking Signal Strength and Quality
One of the first steps in fixing your DStv signal problem is to check the signal strength and quality. This will help you determine if the issue lies with your satellite dish or is a problem with the signal itself.
1. Accessing the Signal Strength and Quality Menu
To check the signal strength and quality on your DStv decoder, follow these steps:
- Press the “Menu” button on your remote control.
- Select “Settings” from the menu options.
- Choose “Satellite Settings” and then “”Signal Strength and Quality””.
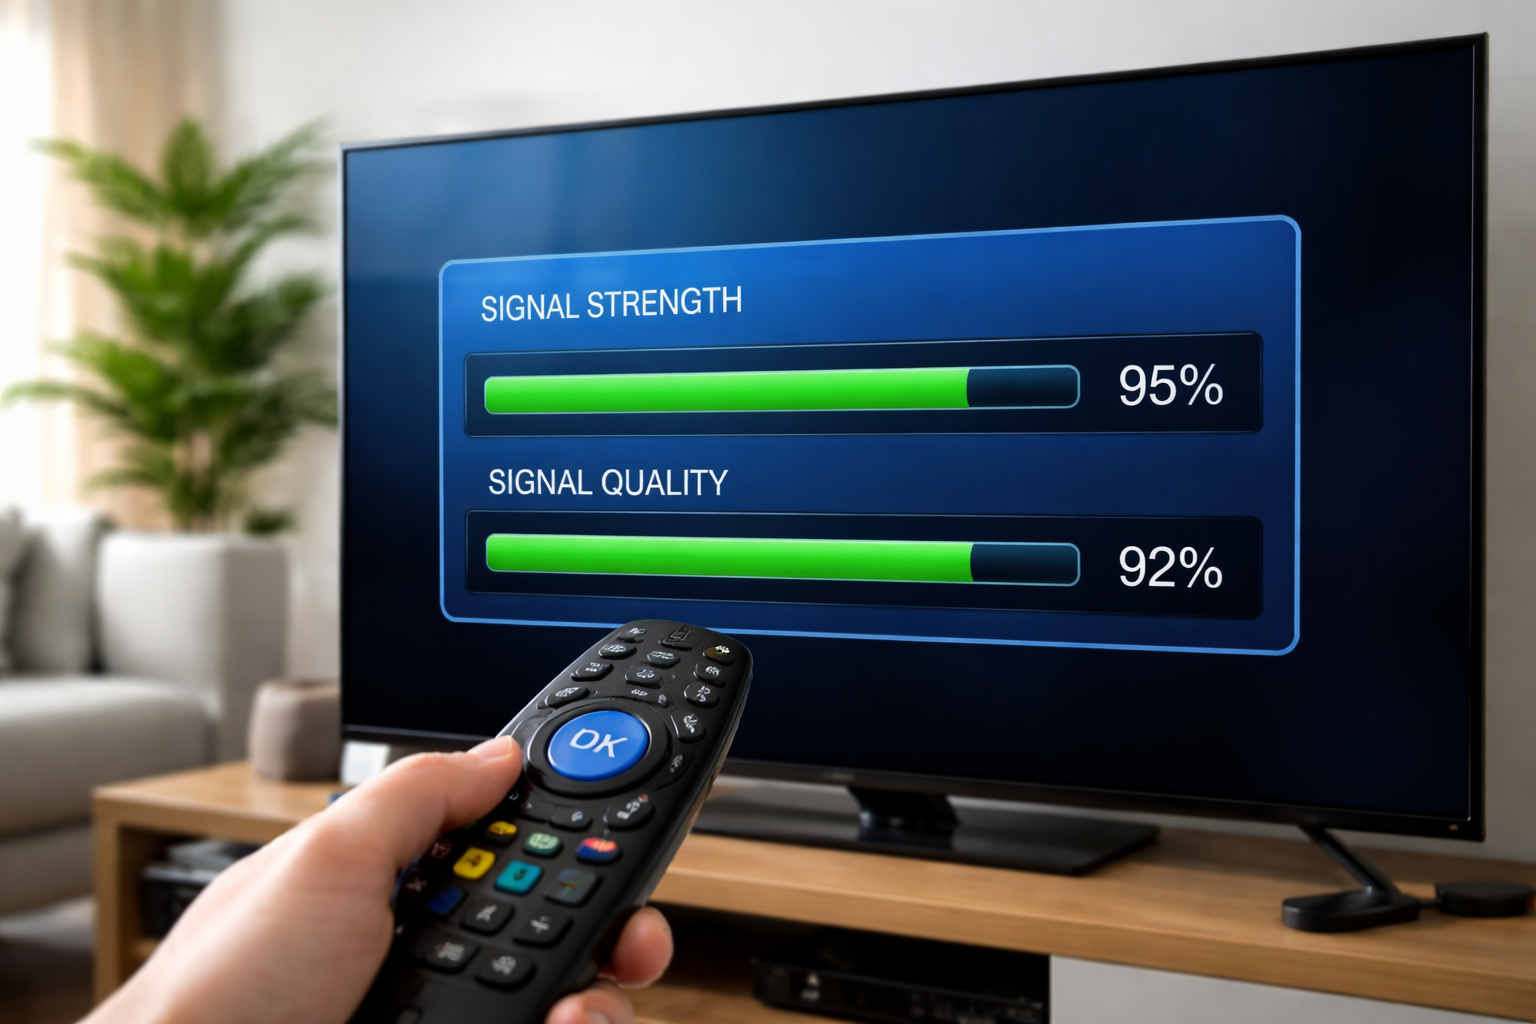
2. Interpreting Signal Strength and Quality
Once you access the signal strength and quality menu, you will see a bar or percentage indicator that represents the signal strength and quality. Ideally, the signal strength should be above 50% and the signal quality should be above 80%. If the values are below these thresholds, you may experience signal problems.
3. Troubleshooting Signal Problems
If you find that your signal strength and quality are below the recommended thresholds, you can try the following troubleshooting steps:
- Check the alignment of your satellite dish and adjust if necessary.
- Inspect the cable connections for any damage or loose connections.
- Remove any obstructions that may be blocking the satellite signal.
- Reset your decoder and reboot it.
- Update the DStv software to the latest version.
If you have followed these troubleshooting steps and are still experiencing signal problems, contacting DStv support for further assistance is recommended.
Adjusting Satellite Dish Alignment
One of the common causes of DStv signal problems is a misalignment of the satellite dish. If your satellite dish is not aligned correctly, it can affect the reception and result in a weak or no signal. Here are the steps to adjust the satellite dish alignment:
1. Locate the Satellite Dish
Find the satellite dish installed on your property. It is usually mounted on a wall or roof and has a clear line of sight to the sky.
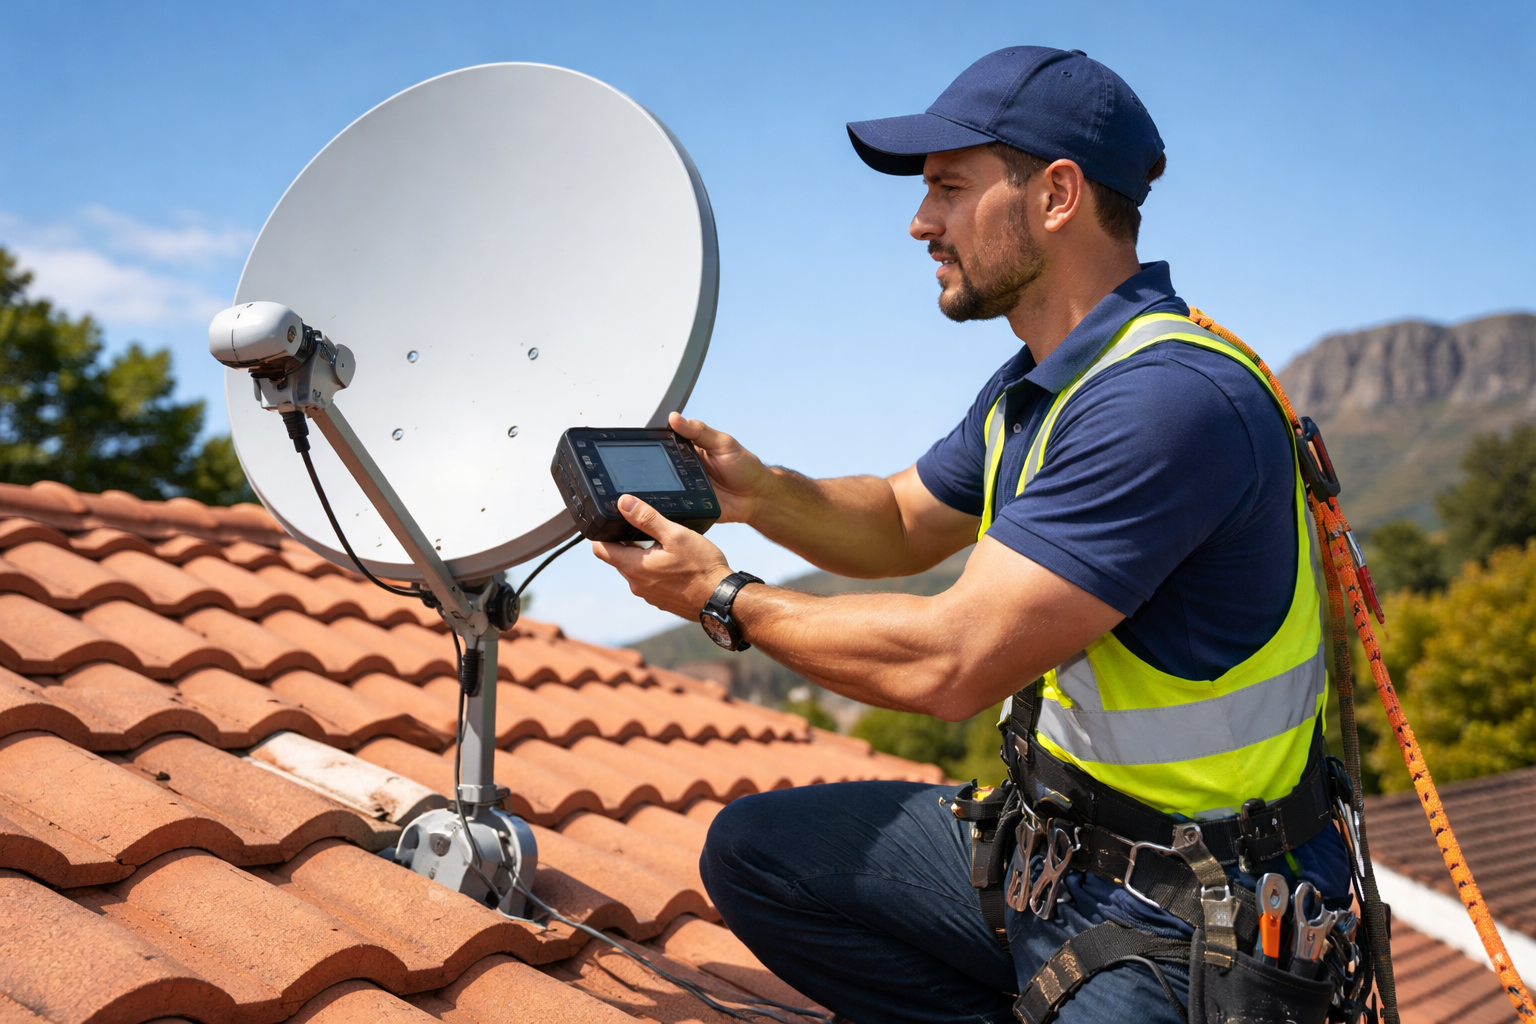
2. Use a Satellite Finder Tool
Use a satellite finder tool, which is a device that helps you determine the best position for the satellite dish. Connect the satellite finder tool between the LNB (Low Noise Block) and the satellite receiver.
3. Adjust the Azimuth and Elevation
Refer to the satellite finder tool instructions to adjust the satellite dish’s azimuth (horizontal alignment) and elevation (vertical alignment). Make minor adjustments and check the signal strength on your TV screen or satellite receiver.
4. Fine-tune the Alignment
Adjust the azimuth and elevation until you achieve the highest signal strength possible. This may require slight movements and readjustments.
5. Secure the Dish
Once you have achieved optimal signal strength, secure the satellite dish in its final position by tightening the bolts or screws. Make sure it is firmly fixed to avoid any movement or misalignment in the future.
Following these steps, you can effectively adjust the satellite dish alignment and improve your DStv signal reception. If the issue persists, you may need to seek professional help or contact DStv support for further assistance.
Adjusting Satellite Dish Alignment
Why is satellite dish alignment important?
Proper satellite dish alignment is crucial for receiving a strong and stable signal. If your dish is misaligned, it can lead to poor reception and signal problems. Adjusting the alignment of your satellite dish can help improve signal quality and ensure a better viewing experience.
Steps to adjust satellite dish alignment
1. Start by accessing the settings menu on your DStv decoder.
2. Look for the “Signal Strength” or “Dish Installation” option in the menu.
3. Select the option to display the signal strength and quality readings.
4. Grab a friend or family member to assist you in adjusting the satellite dish.
5. Loosen the bolts or screws on the satellite dish bracket using a wrench or screwdriver.
6. Slowly and gently move the dish in small increments, left or right, while your assistant monitors the signal strength on the TV screen.
7. Adjust the dish until you find the position that gives you the highest signal strength and quality readings.
8. Tighten the bolts or screws on the satellite dish bracket to secure it in the new position.
Additional tips
– Use a compass to help you determine the general direction of the satellite you are trying to align with.
– Be patient and make small adjustments to the dish position to avoid overshooting the signal.
– If you are unsure about adjusting the satellite dish yourself, consider hiring a professional technician to do it for you.
Checking for Obstructions
One of the common causes of DStv signal problems is obstructions in the line of sight between your satellite dish and the satellite in space. These obstructions can interfere with the signal reception and result in poor or no signal at all. Here are some steps to check for obstructions and address them:
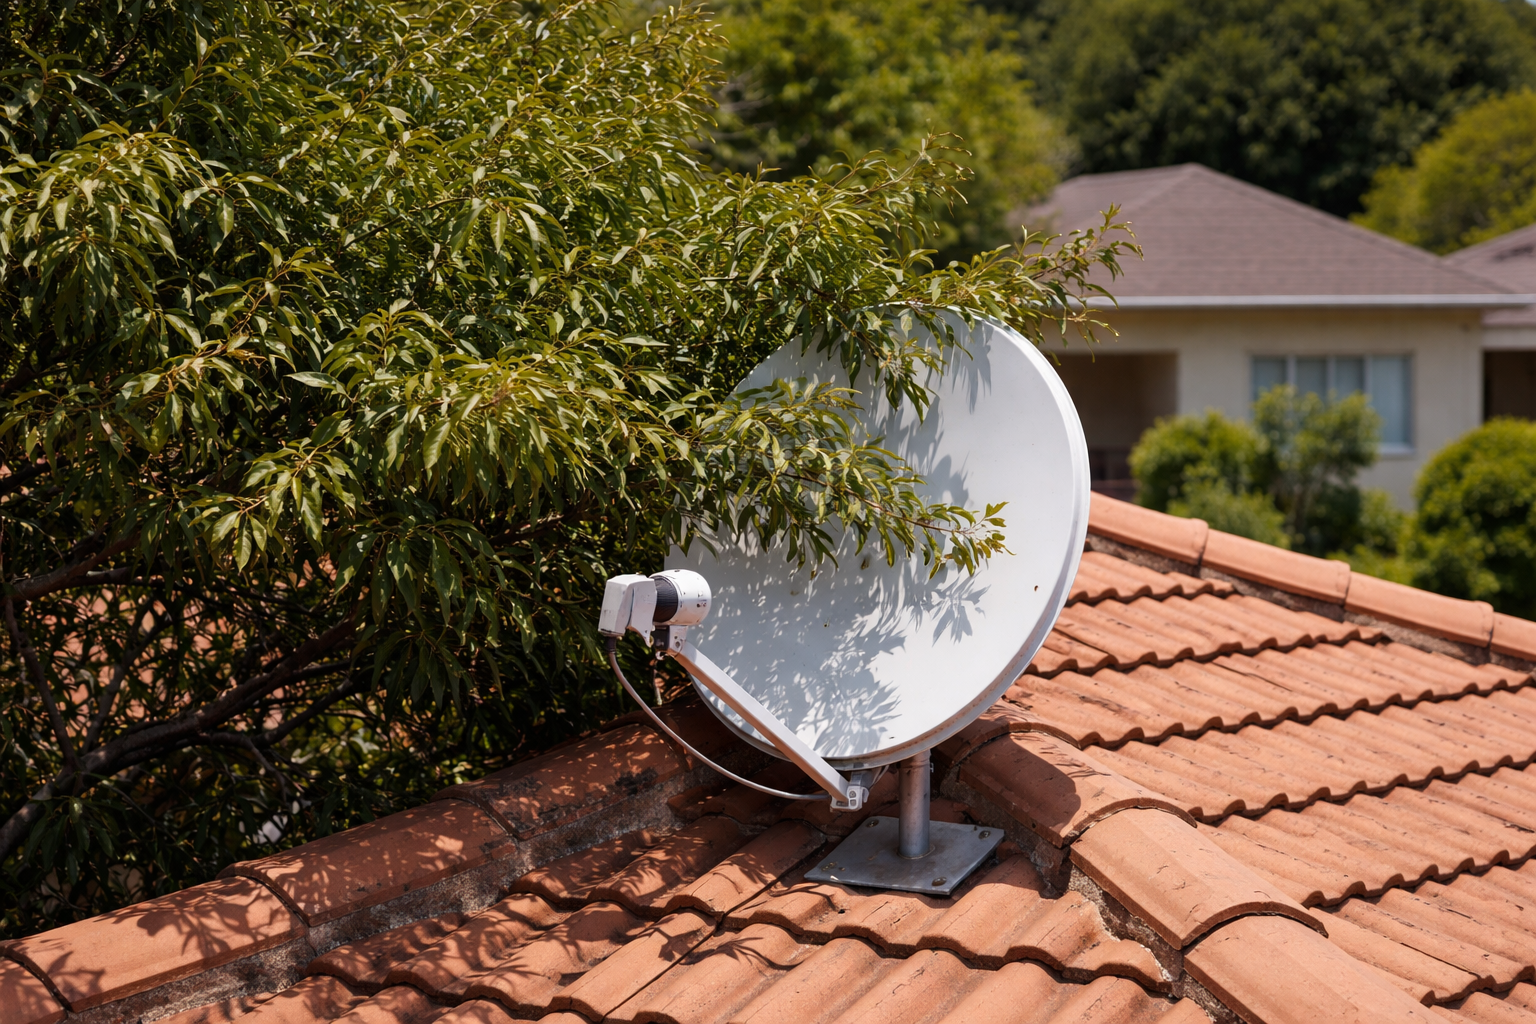
1. Clear any Physical Obstructions
Inspect the area surrounding your satellite dish and ensure that there are no physical obstructions, such as tree branches, leaves, or other objects blocking the path of the satellite signal. Trim any overgrown vegetation that might be blocking the line of sight.
2. Remove any Objects on the Dish
Check the surface of your satellite dish for any objects, such as bird droppings or dirt, that could be obstructing the signal. Gently clean the dish using a soft cloth or sponge and mild detergent. Avoid using abrasive materials or harsh chemicals that could damage the dish.
3. Position the Dish Correctly
Ensure your satellite dish is aligned correctly and pointing towards the correct satellite. Refer to the installation manual or contact DStv support for guidance on the required position and alignment of the dish.
4. Consider Signal Boosters
If you are still experiencing signal problems after checking for obstructions, consider using a signal booster or amplifier. These devices can enhance signal strength and improve reception, especially in areas with weak signal coverage.
Following these steps and addressing any obstructions can improve your DStv signal reception and enjoy uninterrupted satellite TV service.
Resetting Decoder and Rebooting
Resetting the decoder and rebooting your DStv system can often resolve signal problems. Follow these steps:
1. Power off the Decoder
Locate the power button on your DStv decoder and press it to turn off the device. Wait for at least 10 seconds before proceeding to the next step.
2. Unplug the Power Cable
After turning off the decoder, unplug the power cable from the wall outlet. Ensure that the decoder is completely disconnected from the power source.
3. Wait for a Few Minutes
Leave the decoder unplugged for a few minutes. This dissipates residual power and ensures a fresh start when you power it back on.
4. Reconnect the Power Cable
After waiting for a few minutes, plug the power cable back into the wall outlet. Make sure the cable is securely connected.
5. Power on the Decoder
Press the power button on the decoder to turn it back on. Wait for the system to initialize and establish a connection with the satellite.
Note: It may take a few minutes for the decoder to reboot and acquire a signal fully. Be patient during this process.
Following these steps, you successfully reset the decoder and rebooted your DStv system. Check if the signal problem has been resolved. If not, proceed to the next troubleshooting step.
Updating DStv Software
One of the potential causes of DStv signal problems is outdated software on your decoder. Updating the DStv software can often resolve these issues and improve signal reception. Here are the steps to update your DStv software:
1. Check for Available Updates
Access the settings menu on your DStv decoder by navigating to the “Menu” or “Settings” option on your remote control. Look for a “Software Update” or “System Upgrade” option. Select it to check for available updates.
2. Start the Software Update
If there are updates available, a prompt will appear on your screen. Follow the on-screen instructions to start the software update process. Make sure to keep your decoder connected to a stable power source and do not interrupt the update process.
3. Wait for the Update to Complete
The software update may take some time to complete, depending on the size of the update and your internet connection speed. Avoid switching off your decoder or interrupting the update process to prevent any potential issues.
4. Restart the Decoder
Once the software update is complete, restart your decoder by turning it off and then back on again. This will ensure that the updated software is properly applied and activated.
Note: If you are still experiencing signal problems after updating the DStv software, you may need to consider contacting DStv support for further assistance.
Contacting DStv Support
If you have followed the troubleshooting steps mentioned earlier and cannot resolve the DStv signal problem, it is time to seek assistance from DStv support. Contacting DStv support will connect you with trained professionals who can provide further guidance and assistance in resolving the signal issue.
There are several ways to reach out to DStv support. One option is to call their customer service hotline, which can be found on their official website or your DStv decoder. When calling, be prepared to provide your account details and a detailed description of the signal problem you are experiencing. The customer service representative will guide you through additional troubleshooting steps or may schedule a technician visit to your location if necessary.
Another option is the DStv self-service portal, which allows you to log in to your account and submit a support request online. This can be a convenient way to seek assistance, mainly if you prefer not to make a phone call.
DStv has a solid online presence and can be reached through its social media channels. You can message them on platforms such as Facebook or Twitter, and their support team will respond to your query.
By contacting DStv support, you can ensure that you receive professional assistance tailored to your specific signal problem. Their expertise and resources will help you resolve the issue and get back to enjoying uninterrupted satellite TV service.” ”
Conclusion
In conclusion, troubleshooting DStv signal problems can be a frustrating experience, but with the right knowledge and steps, you can often resolve the issue on your own. Following the troubleshooting tips in this guide can improve your signal reception and enjoy uninterrupted satellite TV service.
Remember these key points:
- Understanding DStv signal problems is crucial in identifying and resolving the issue.
- Checking signal strength and quality helps determine the strength of the signal reaching your decoder.
- Adjusting satellite dish alignment can improve signal reception and minimize signal loss.
- Inspecting cable connections ensures that they are securely connected and not damaged.
- Checking for obstructions, such as trees or buildings, that may be blocking the satellite signal is essential.
- Resetting your decoder and rebooting can often resolve temporary signal issues.
- Updating DStv software ensures that you have the latest firmware, which may include bug fixes and enhancements.
- If all else fails, contacting DStv support is recommended for further assistance.
With these troubleshooting steps and tips, you can address common DStv signal problems and enjoy uninterrupted satellite TV service. Remember to consult the official DStv support channels for additional guidance if needed.
Need Professional DSTV Installation?
Our accredited installers are ready to help with Explora, satellite dish, Extra View setups, and more. Same-day service available across South Africa.