Connecting the LNB cable from your dish to the Explora is the join that decides whether you get a clean picture or a screen full of E48-32 errors. The LNB (Low-Noise Block downconverter) sits on the satellite dish arm, and the coax running from it carries the signal down to the decoder. Get the right cable, the right port and a properly fitted F-connector and the rest of the setup falls into place. This guide walks through what we do on a real install.
- The LNB cable is coax (RG6) running from the dish's LNB to the decoder's "LNB In" port — it carries the satellite signal to the Explora.
- Choose the LNB type by how many tuners you feed: single, twin, quad or octo. The Explora 2 and 3 use a twin (two-feed) LNB.
- Strip about 1cm of outer jacket, fit an F-connector firmly, and hand-tighten at the port — no loose threads, no stray copper braid.
- Always check signal quality and signal strength on the decoder before you pack up.
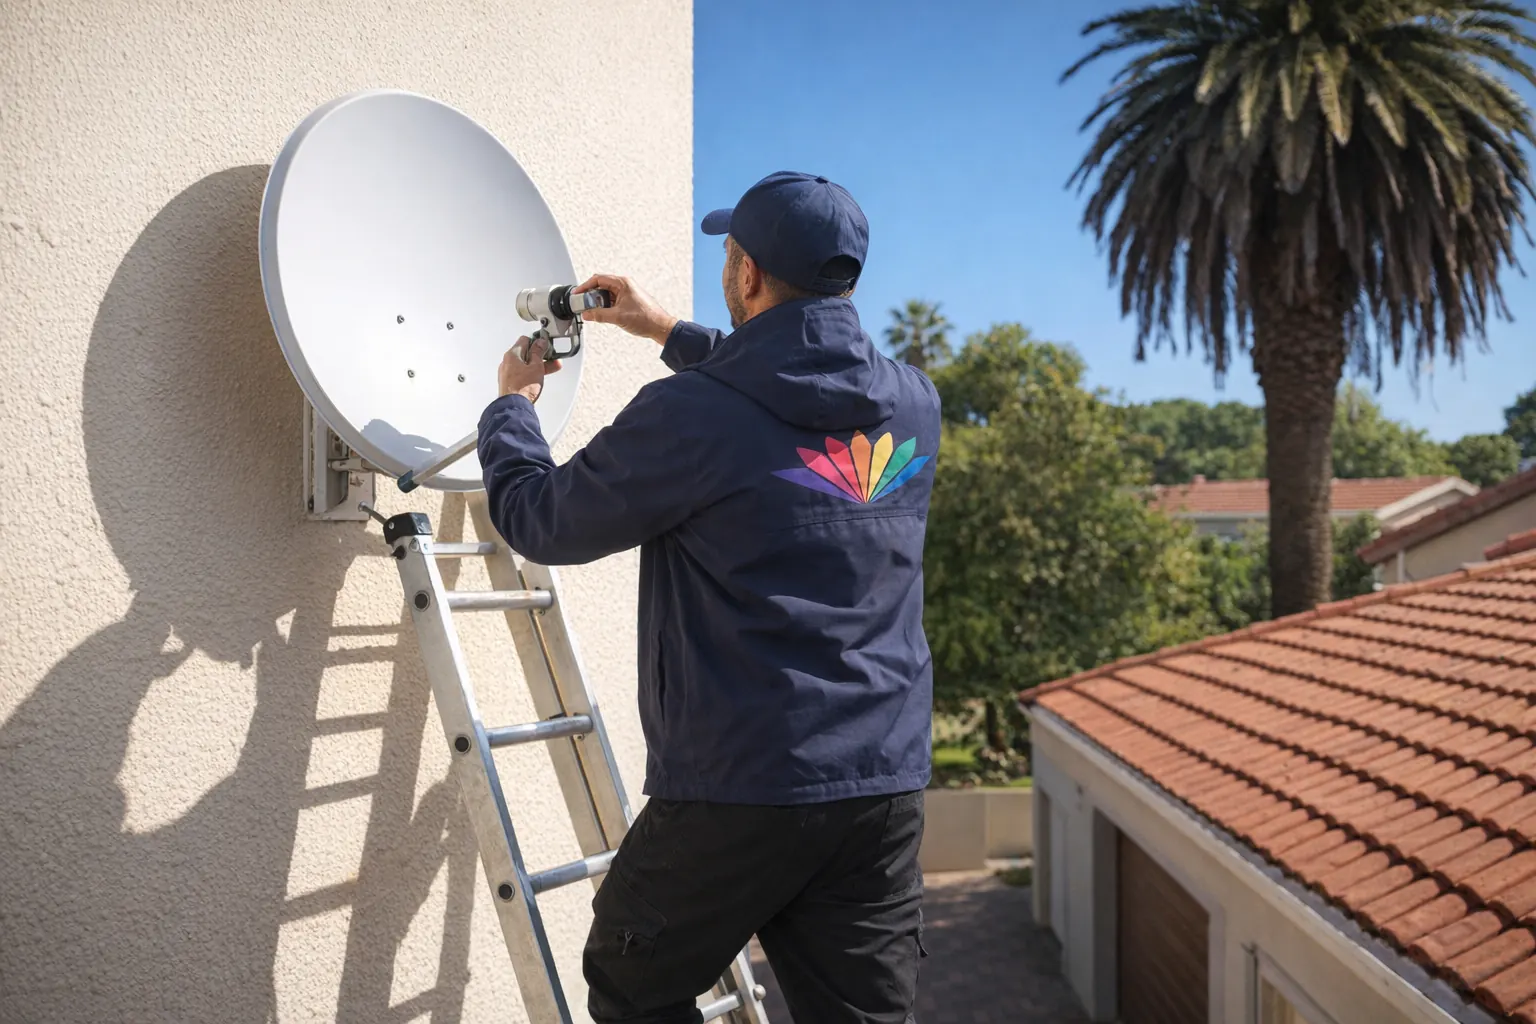
- Working at height on a roof is the real risk here — if the dish needs adjusting, that is a job for a harnessed installer, not a ladder and good intentions.
What an LNB Cable Is and What It Does
LNB stands for Low-Noise Block downconverter. The LNB cable is a coaxial cable that carries the satellite signal from the LNB on the dish arm down to your decoder. The LNB itself does the clever part: it takes the very high-frequency signal the dish collects from the satellite and converts it to a lower frequency that can travel down ordinary coax without falling apart over the run.
Because it is coax, the cable has a solid copper centre conductor, a dielectric layer, a braided shield and an outer jacket. That shield matters — it is what keeps interference out and signal in. When we talk about "the LNB cable" we mean this coax run plus the F-connectors on each end that screw onto the LNB and the decoder.
If you want to understand the dish side of the picture before you start, our guide to find your DStv signal using your phone covers how the dish has to be pointed for the LNB to receive anything worth carrying.
Choosing the Right LNB and Cable Type
There are four common LNB types, and the right one depends on how many tuners or decoders you are feeding. A single LNB has one output. A twin LNB has two — which is what a DStv Explora needs, because the Explora records on one tuner while you watch on another. Quad and octo LNBs (four and eight outputs) come into play when you are feeding multiple decoders or running several rooms, which is exactly how a DStv Extra View setup links several TVs under one subscription.
For the cable itself, use proper satellite-grade coax. RG6 is the standard for satellite runs — its thicker centre conductor and better shielding hold the signal over longer distances than thinner RG59. Match the run length to the distance between dish and decoder with a little slack; overly long, coiled cable and overly tight bends both cost you signal.
| LNB / cable | Outputs | Typical use |
|---|---|---|
| Single LNB | 1 | One single-tuner decoder, one TV |
| Twin LNB | 2 | DStv Explora — watch one channel, record another |
| Quad LNB | 4 | Multiple decoders / a few rooms |
| Octo LNB | 8 | Larger multi-room or multi-decoder setups |
| RG6 coax | — | Satellite-grade cable for the LNB-to-decoder run |
Signal strength depends partly on where you are geographically. A cable type or dish size a friend swears by in another province will not automatically be right for your location, so treat advice from elsewhere as a starting point, not a rule.
Tools You Need Before You Start
You do not need a van full of kit to fit an LNB cable, but the few tools you do need have to be the right ones. Working with the wrong tool here usually means a loose connector and a weak signal later.
- Screwdriver — a small Phillips head for tightening the F-connectors onto their ports securely.
- Cable cutter — sharp enough to cut the coax cleanly and strip excess insulation without crushing the centre conductor.
- F-connectors — the threaded metal connectors that fit onto each end of the coax. Make sure they match your cable's diameter.
- Cable ties or clips — to secure the run after installation so wind and weather cannot work the cable loose over time.
Have all of it laid out before you begin. Stopping halfway up a job to hunt for a connector is how cables get left half-fitted and signal gets lost.
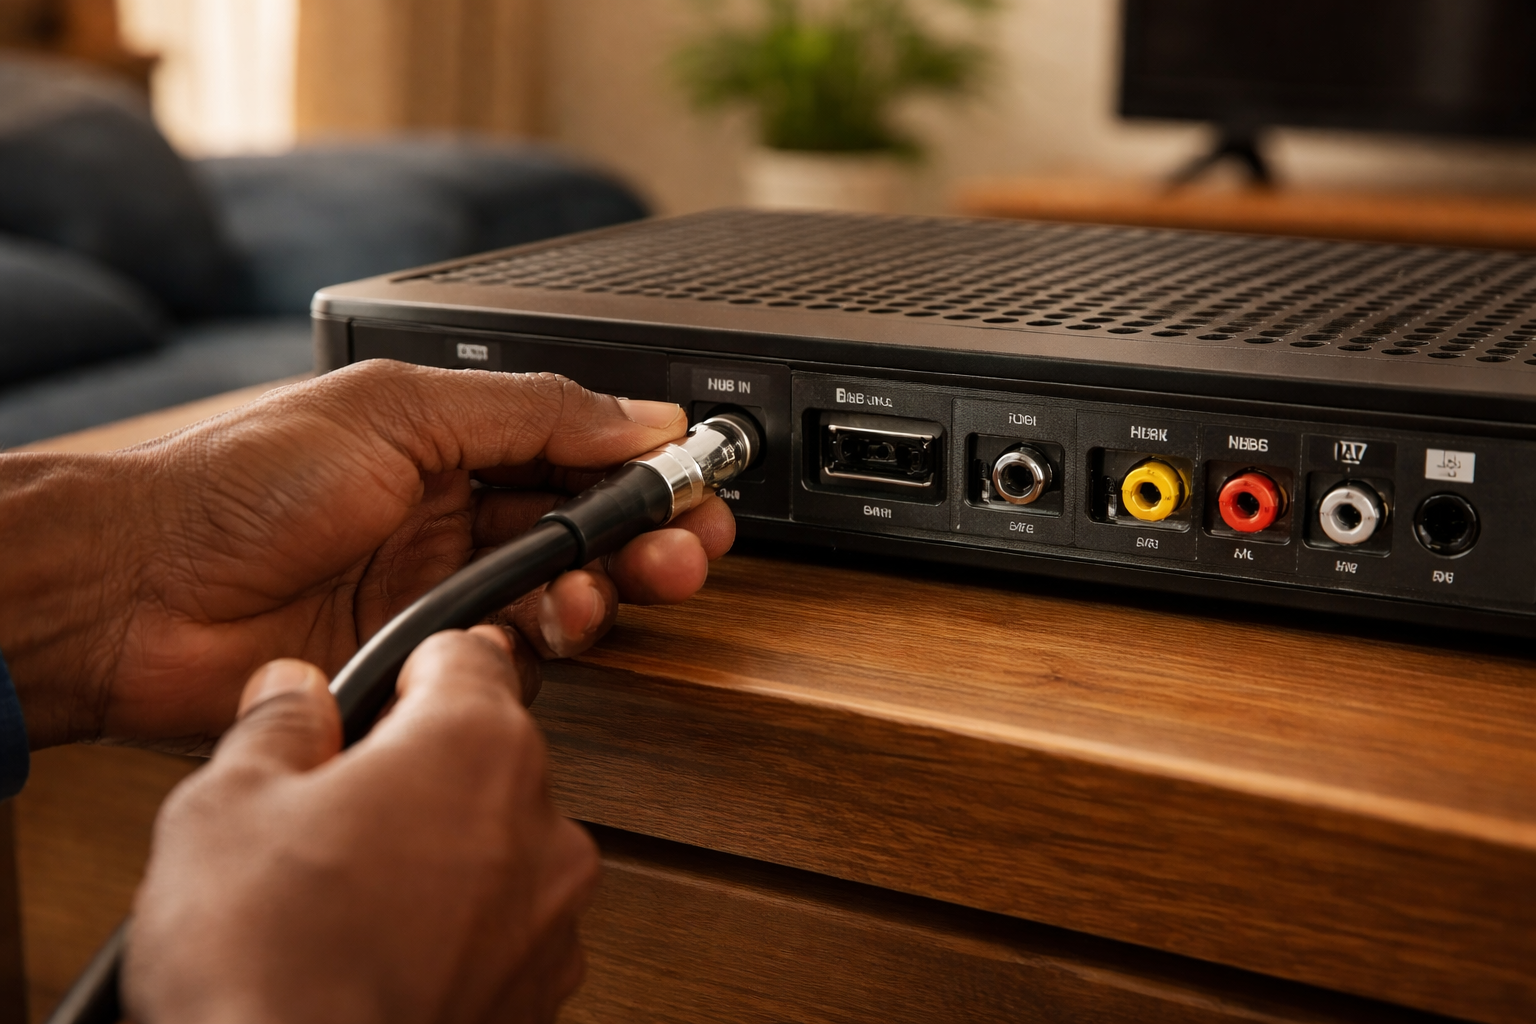
How to Connect the LNB Cable to the Decoder
This is the core of the job: getting the coax onto the right port with a properly seated connector. Work in order and do not rush the F-connector — that one step is where most signal problems are born.
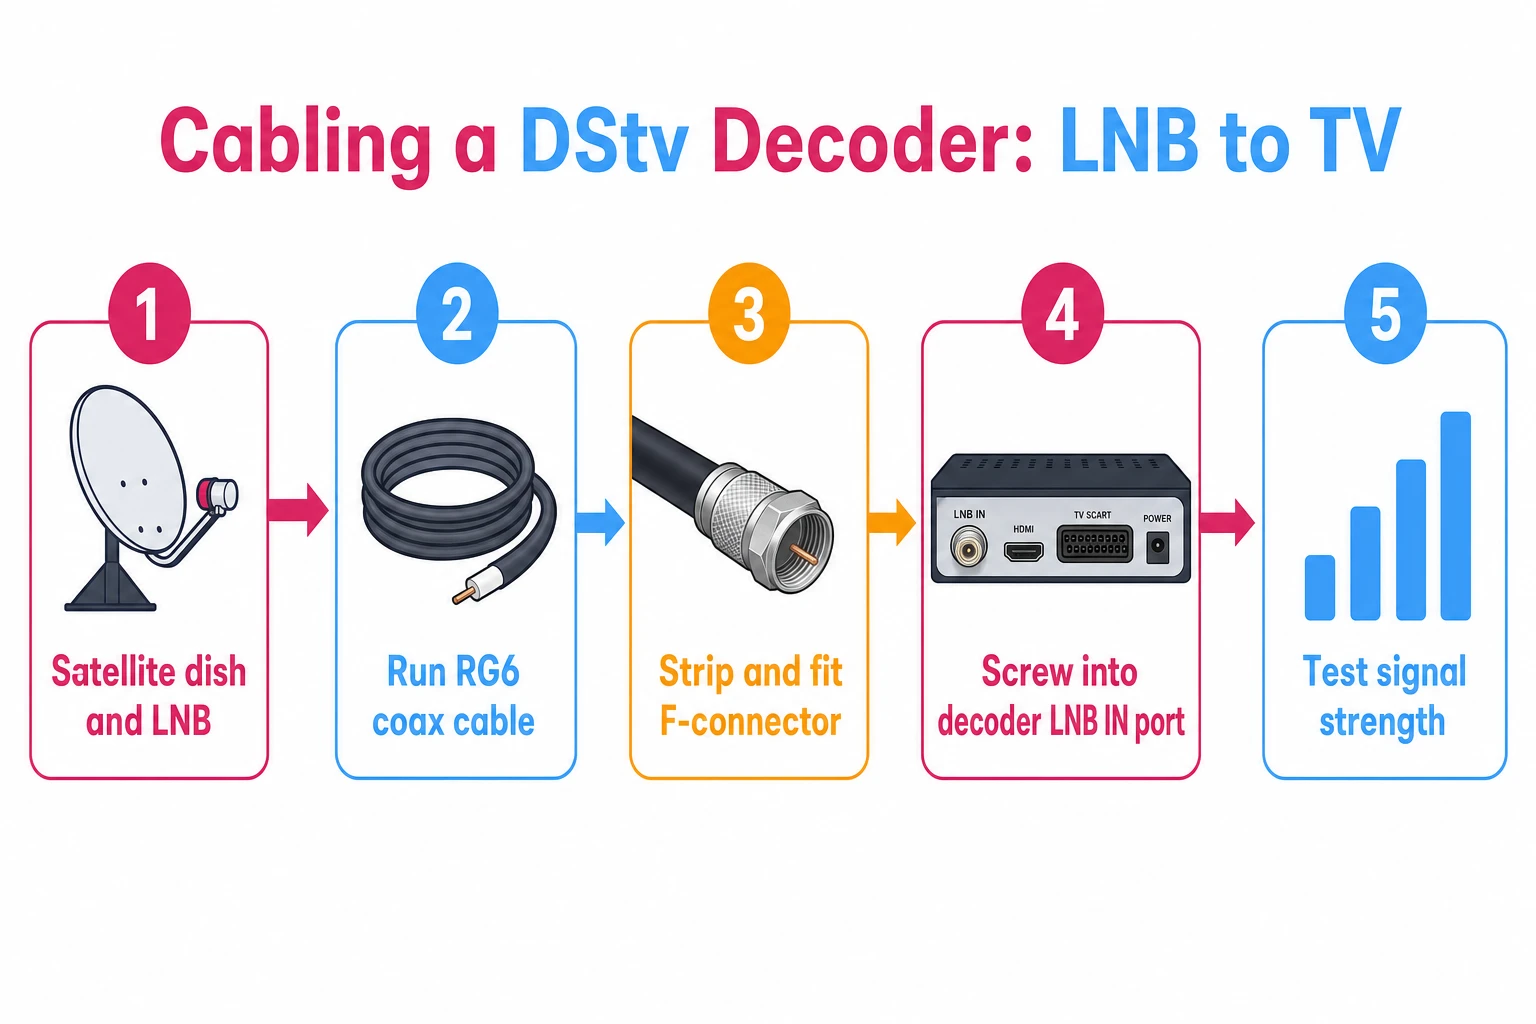
Identify the Correct Ports
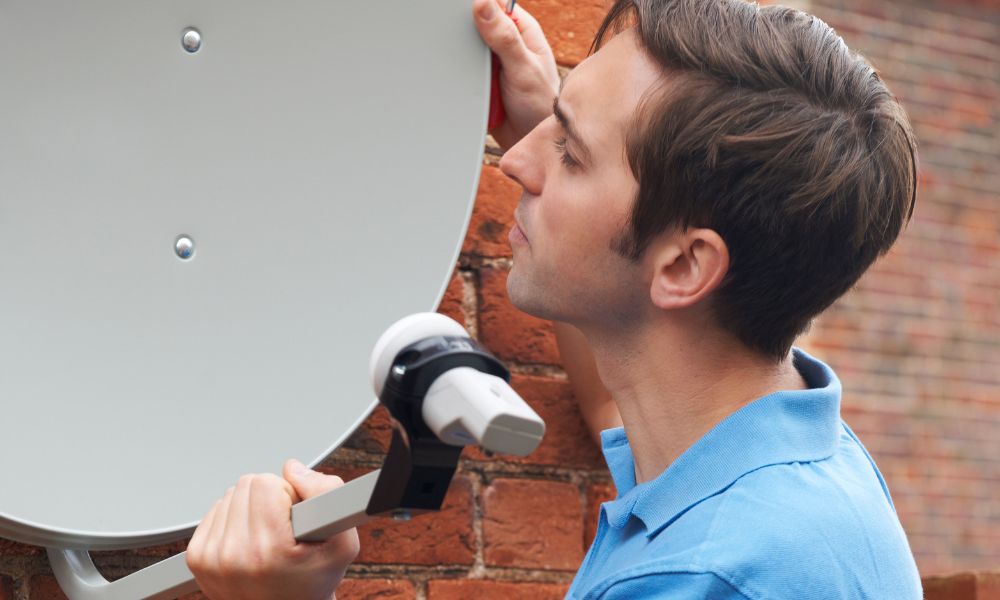
On the decoder, look for the LNB input. Many Explora models label two ports "LNB In" and "LNB Out" — the primary cable goes into "LNB In," and the second feed of a twin LNB uses the other. Some models have only one LNB input. On the dish, the port is the connector at the end of the LNB arm; your primary cable connects there.
Strip and Fit the F-Connector
Strip about 1cm of the outer insulation from the cable end. Twist any exposed braid back tightly so no stray strands can short against the centre conductor. Slide an F-connector onto the stripped cable until it sits about 1cm from the end, with the threaded part facing out. Then screw each F-connector onto its port — firm and hand-tight.
Hand-tighten the F-connector until it is snug. Over-tightening with pliers can damage the cable or the port and makes the connector a nightmare to remove later if you ever need to. Snug and clean beats forced every time.
Common Mistakes to Avoid
- Bending or twisting the coax too tightly — sharp bends cause signal loss.
- Connecting the primary cable to the wrong port on the decoder.
- Leaving an F-connector loose — a connection that is not snug will drop your signal.
- Packing up before testing — always confirm signal after you connect.
Testing Your Connection
Once the cable is on and the decoder is hooked up to the TV, test before you call it done. Testing tells you the signal is actually reaching the Explora and that the channels will scan in.
Check Signal Strength and Quality
On the decoder, go to the "Settings" menu and select "Satellite Settings" to see signal strength and quality. Check both: strength tells you how much signal is arriving, quality tells you how clean it is against interference. If there is no signal, or the reading is weak, the dish likely needs adjusting. Our walkthrough on how to check your signal strength covers the menu path in detail.
Run a Channel Scan
To pull in all available channels, run a scan after connecting. From "Settings," open "Satellite Settings," choose "Scan All Networks" and let it finish — it can take a few minutes depending on how many channels are available in your area.
Troubleshooting and When to Call an Installer
If something is not right after connecting, work through the basics before assuming the worst. Most faults come back to the connection itself or the dish.
- Check your connections — no signal or a poor picture on some channels usually means a loose or damaged connector between decoder and dish. Re-seat and re-tighten.
- Reposition the dish — if connections are sound, the dish may have a blocked line of sight. Trees or a new building between the dish and the satellite will cut signal.
- Call a technician — if neither fixes it, the LNB or cable may be faulty, and a professional can diagnose it properly.
Repositioning a dish almost always means working at height. A roof, a ladder and a satellite dish are not a DIY combination worth a fall. If the dish needs realigning, leave it to a harnessed installer — the call-out costs far less than an injury. The cabling at the decoder you can do; the work on the roof you should not.
If you would rather not climb at all, our DStv installation in Midrand team handles the lot end to end — from professional satellite dish installation through to decoder setup and signal testing. You can also book general DStv installation if you are setting up a new home from scratch.
Further reading
Connecting DStv Explora LNB cables comes down to the right cable, the right port and a clean, snug F-connector — then testing before you walk away. A poor connection means a poor picture or no signal at all. Get the join right and the dish pointed properly, and the Explora does the rest.
Need Professional DSTV Installation?
Our accredited installers offer same-day service across South Africa.